How to Send Python Logs to Loggly
Logging in a Python application is straightforward. When you have good logs, you have better visibility into application health. You can monitor performance and track user activity. You’re better equipped to debug errors. Life is good.
The challenges come when your application grows more complex. Perhaps your Python code is part of a broader application, or you have services distributed across multiple machines or clouds. As your applications scale and your logs get scattered across different environments, it can become a nightmare. This is where you need to start thinking beyond basic logging. You need log management.
In this guide, we’ll walk you through sending your Python logs to SolarWinds® Loggly®, a centralized log management platform. Loggly is a powerful solution for collecting, aggregating, and analyzing logs from various sources, including your Python applications. With your logs centralized in Loggly, you get a unified view of your application activity.
Understanding Python Logging
Python’s built-in logging module gives you a structured approach to generating and managing log messages. Here are some key concepts to get you oriented:
- Loggers are the entities within your application that generate logs.
- Handlers determine where to send log messages. Python has built-in handlers, such as StreamHandler (logs to the console) and FileHandler (logs to a file). In our case, we’ll use HTTPSHandler from the loggly library to send our logs to Loggly.
- Formatters define the format of log messages, specifying elements like timestamp, severity level, logger name, and message content.
- Levels indicate the severity of a log message. They include (from low to high) DEBUG, INFO, WARNING, ERROR, CRITICAL. Higher levels represent more critical events.
The Benefits of Centralized Logging with Loggly
Python’s built-in logging module is helpful, but it can be cumbersome to use in production environments with multiple servers or microservices. When you use a centralized logging solution like Loggly, you get several key benefits:
- Unified view of logs: Aggregate logs from all Python applications (and any other services in your broader application) at a single, centralized location.
- Scalability: As your application grows, you can easily handle the increased log volume.
- Structured search: Search logs efficiently based on criteria such as timestamps, severity levels, and keywords.
- Filtering: Focus on relevant information by filtering your log views based on various parameters.
- Real-time monitoring: Gain immediate insights into application behavior for faster troubleshooting.
- Alerting: Set up alerts for critical events based on log messages.
- Visualization and dashboards: Custom dashboards allow you to visualize log data for more straightforward analysis.
- Log retention: Store and manage logs for extended periods for historical analysis or compliance purposes.
Set Up Loggly
To send your Python logs to Loggly, you’ll need a Loggly account. Start by signing up for a free trial account.
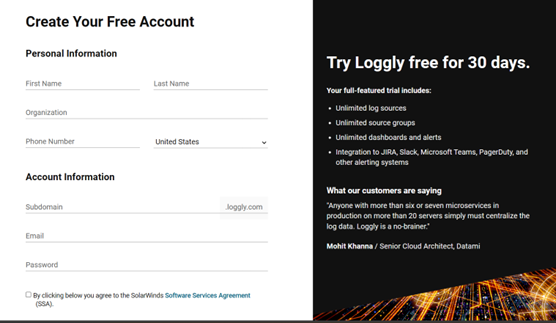
After logging in, navigate to your account settings and locate your customer token. You’ll use this token for authentication when configuring logging in your Python script.

Implement Logging in Python
With your Loggly account set up, you can implement logging in Python.
Step 1: Install the loggly-python-handler and logging libraries.
Start by installing the necessary libraries using pip.
pip install loggly-python-handler[http-transport]
pip install logging
Step 2: Import libraries.
Import the required libraries into your Python script. You’ll need the logging library for basic logging functionality and the HTTPSHandler from Loggly to send logs to the Loggly servers.
import logging
from loggly.handlers import HTTPSHandler
Step 3: Add the customer token for authentication.
Copy the Loggly customer token you generated. Set the value of LOGGLY_TOKEN to the copied value.
LOGGLY_TOKEN = 'YOUR_CUSTOMER_TOKEN'
Step 4: Set up the logger.
Use logging.getLogger() to retrieve the logger instance. Then, set its logging level to INFO.
logger = logging.getLogger('LogglyLogger')
logger.setLevel(logging.INFO)
Step 5: Create an instance of HTTPSHandler
Create an instance of HTTPSHandler to handle logging requests and ensure logs are sent securely to the Loggly servers.
https_handler = HTTPSHandler(url=f'https://logs-01.loggly.com/inputs/{LOGGLY_TOKEN}/tag/python') Step 6: Set the handler to use a custom formatter.
Define a formatter to specify how log messages should be formatted before sending them to Loggly. Then, set your handler to use the formatter you created.
formatter = logging.Formatter('%(asctime)s - %(name)s - %(levelname)s - %(message)s')
https_handler.setFormatter(formatter)
Step 7: Add the handler to the logger.
Add the handler to the logger to start sending log messages to Loggly.
logger.addHandler(https_handler)

# Your application code here
# ...
Step 8: Generate log messages.
You can now log messages using the configured logger. Any message you log from here will be sent to Loggly, where you can perform further analysis.
# Example log messages
logger.info('Application has started')
logger.warning('An example warning message')
logger.error('An example error message')
Step 9: Integrate logging to Loggly into your application.
Incorporate the above logging setup into your application code as needed. Customize the logging messages and placement according to your application’s requirements.
Here’s the complete code for the steps we’ve taken to configure logging to Loggly:
import logging
from loggly.handlers import HTTPSHandler

# Replace 'YOUR_CUSTOMER_TOKEN' with your actual Loggly customer token
LOGGLY_TOKEN = 'YOUR_CUSTOMER_TOKEN'

# Set up the logger
logger = logging.getLogger('LogglyLogger')
logger.setLevel(logging.INFO)

# Create the HTTPSHandler instance
https_handler = HTTPSHandler(url=f'https://logs-01.loggly.com/inputs/{LOGGLY_TOKEN}/tag/python')

# Create a formatter and set it for the handler
formatter = logging.Formatter('%(asctime)s - %(name)s - %(levelname)s - %(message)s')
https_handler.setFormatter(formatter)

# Add the handler to the logger
logger.addHandler(https_handler)

# Your application code here
# ...

# Example log messages
logger.info('Application has started')
logger.warning('An example warning message')
logger.error('An example error message')

# Run your application...
Managing Your Logs in Loggly
Now that your logs are being sent to Loggly, let’s look at how you can manage your logs within the Loggly platform.
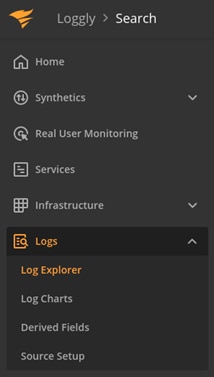
Log in and access the Logs Explorer.
Log in to your Loggly account from your web browser. In the sidebar, navigate to Logs and select Logs Explorer.
View recent logs
The Logs Explorer will display your most recently sent logs.
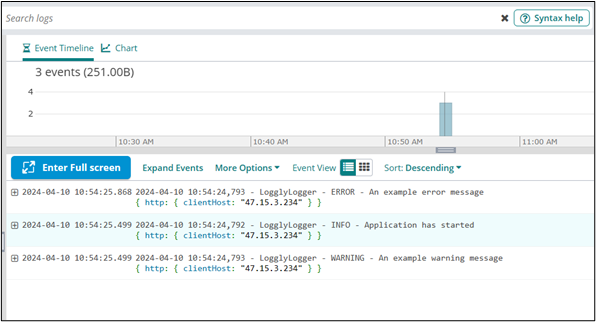
Additional note: If no logs appear in the default tab, try clicking on the “+” icon in the top left corner to create a new log tab.
Search logs
You can use the search bar at the top of the Logs Explorer to find specific logs within the displayed data.
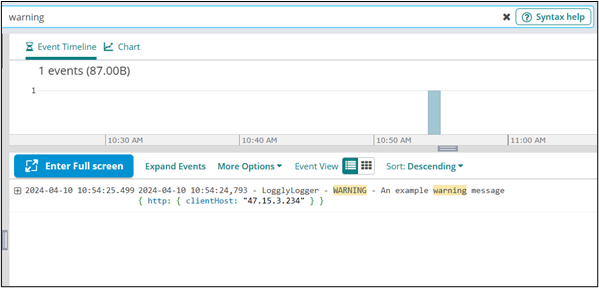
Additionally, Loggly supports advanced search operators, allowing you to refine your search queries for more precise results.
Conclusion
In this guide, we’ve explored how to set up your Python application to send its logs to Loggly. We’ve covered the libraries you need, how to configure the logger and the HTTPSHandler, and how to search and view your logs in the Logs Explorer.
From here, as you build more complex Python applications, you no longer need to worry about how to manage log files scattered across different environments and servers. With Loggly, all your logs are in one place. Now, you’re ready to take your Python development to the next level!
The Loggly and SolarWinds trademarks, service marks, and logos are the exclusive property of SolarWinds Worldwide, LLC or its affiliates. All other trademarks are the property of their respective owners.

Loggly Team